Installing Clearfy plugin from WordPress administration dashboard
The easiest way is to install Clearfy from the WordPress.org repository.
Go to Admin Dashboard > Plugins > Add new

Type “Clearfy” at the search area and click “Install new”.
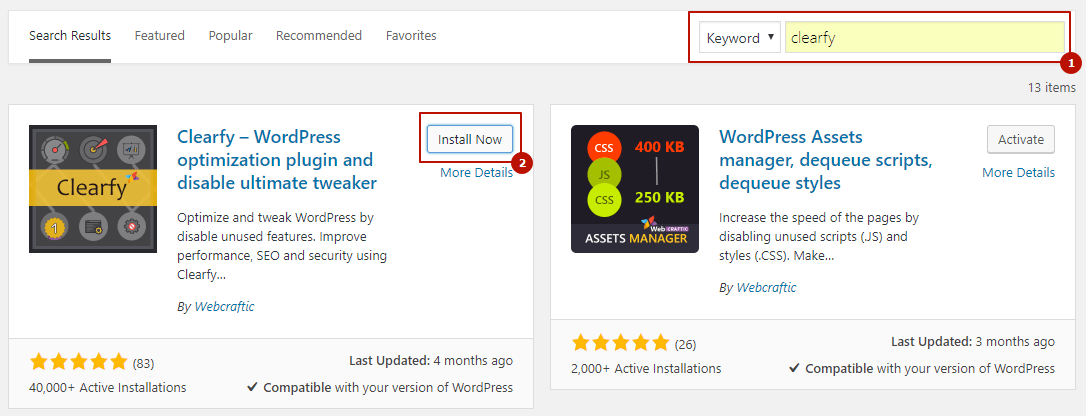
Once the installation is completed, click “Activate”.
Installation of the Clearfy plugin using FTP client
Sometimes you may need an alternative way of installing items. For example, if you can’t upload files through the WordPress admin dashboard due to some limitations from your hosting.
In our case, we’ll upload plugin files to the hosting using the Filezilla FTP client and File Transfer Protocol.
Go to https://wordpress.org/plugins/clearfy/ and click “Download”

Unzip the archive and open your FTP client. We’ll need the /wp-content/plugins folder – it’s the path where your plugins are stored.
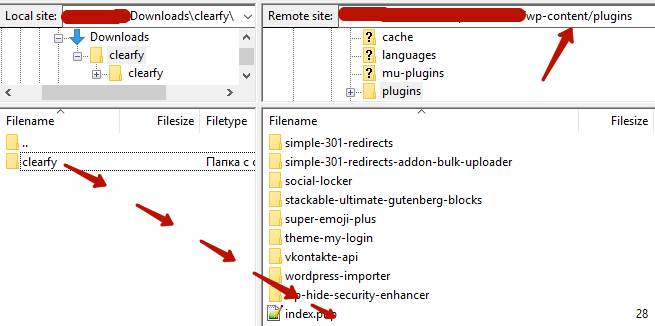
Drag & drop the Clearfy plugin folder from the default path to the plugins folder on your hosting. Be careful: the Clearfy folder should be moved to another Clearfy folder. If you’ve done everything right, you’ll see a new plugin at the “Installed plugins” page on the dashboard:

Complete the installation by clicking the “Activate” link.